

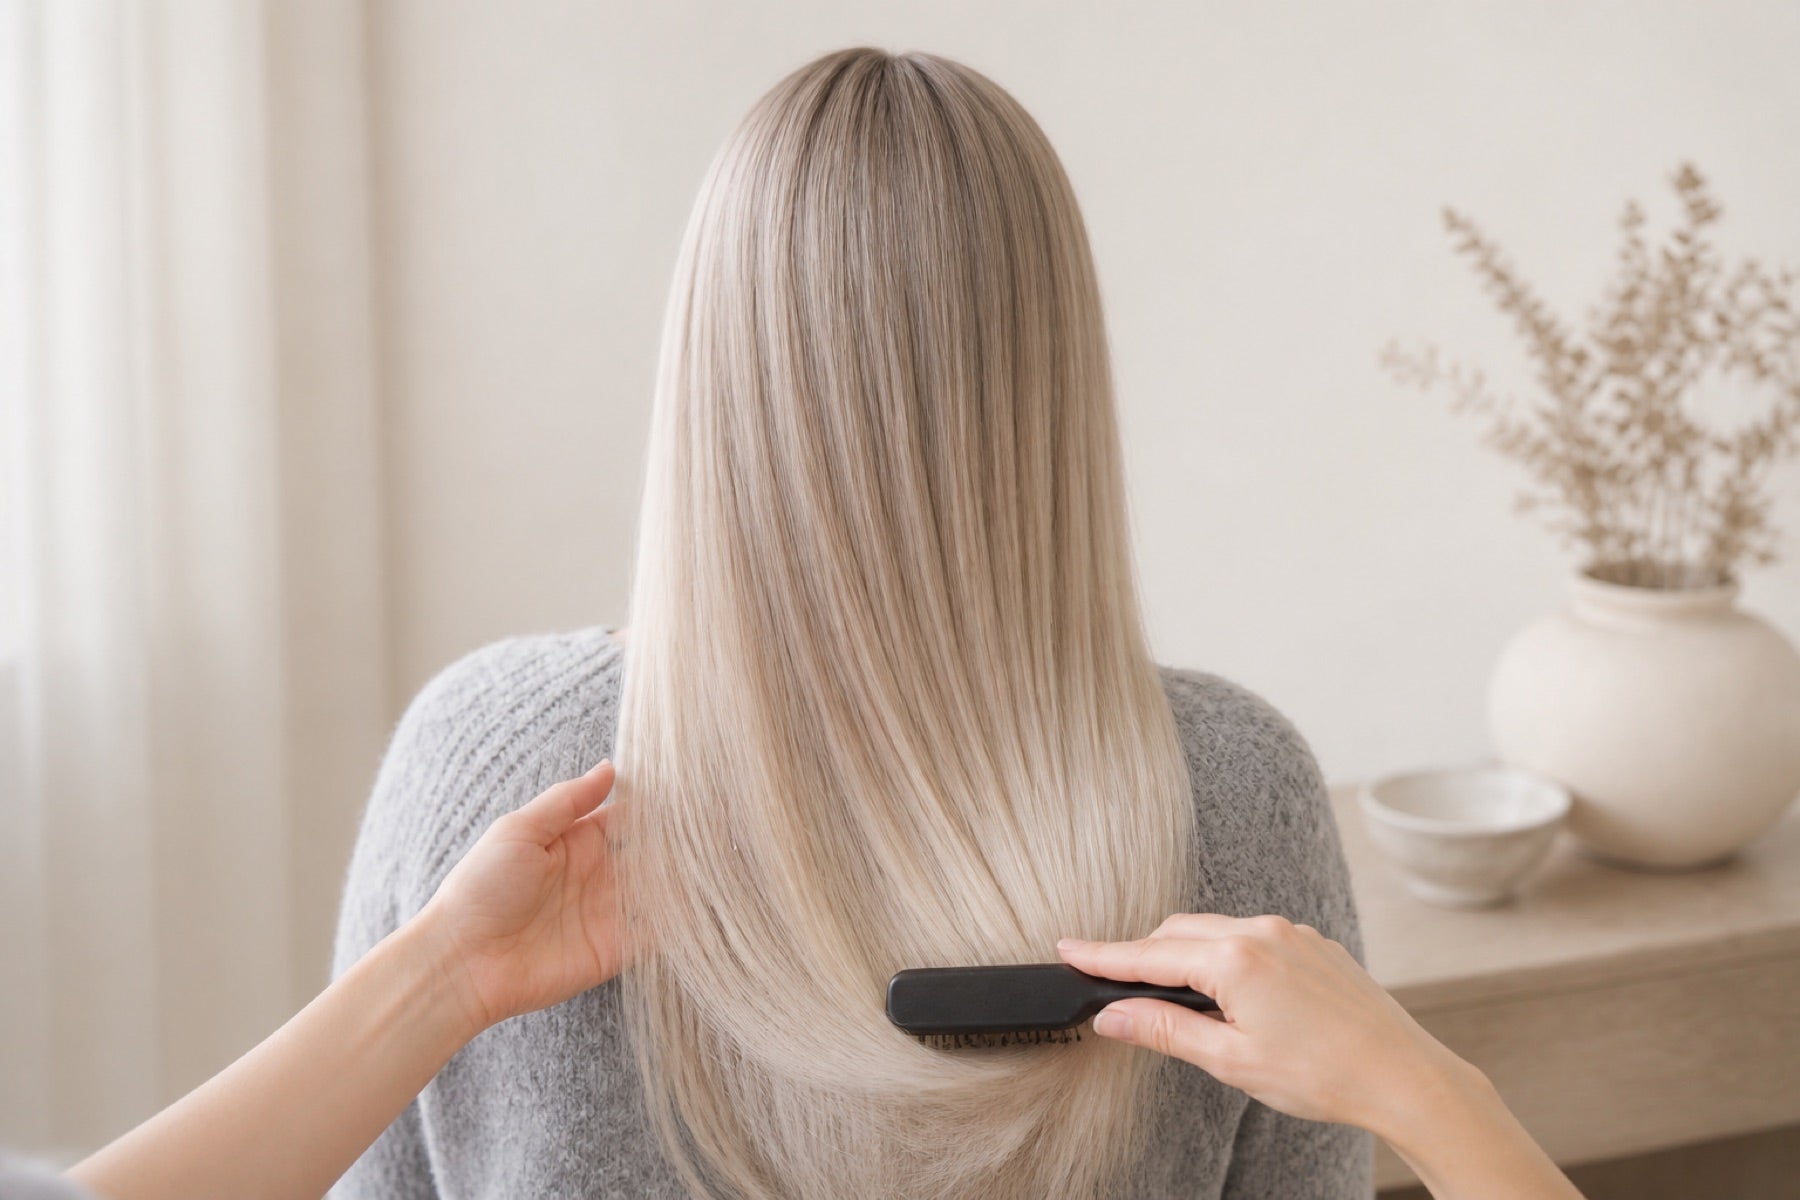
A natural result - applied correctly, step by step.
The Genius Butterfly Hole Weft is attached with small microrings - without glue and without heat. This guide takes you from preparation through to the later re-fitting.
GENIUS BUTTERFLY HOLE WEFT
Application at a glance
Flat, flexible and developed for a natural result.
Gentle without glue
The weft is attached with small microrings, without glue or heat.
Precise, custom fit
The weft can be divided to suit the head shape and placement.
Easy to re-fit
Intact microrings can be reused when re-fitting.
Good preparation makes the difference.
Work calmly, in small sections and without tension. The weft follows the shape of the head and is attached only where enough of your own hair supports a secure and hidden connection.
Our recommendation: At the back of the head, the application is much easier to control with a second person. If you feel unsure, choose a Stessia partner.
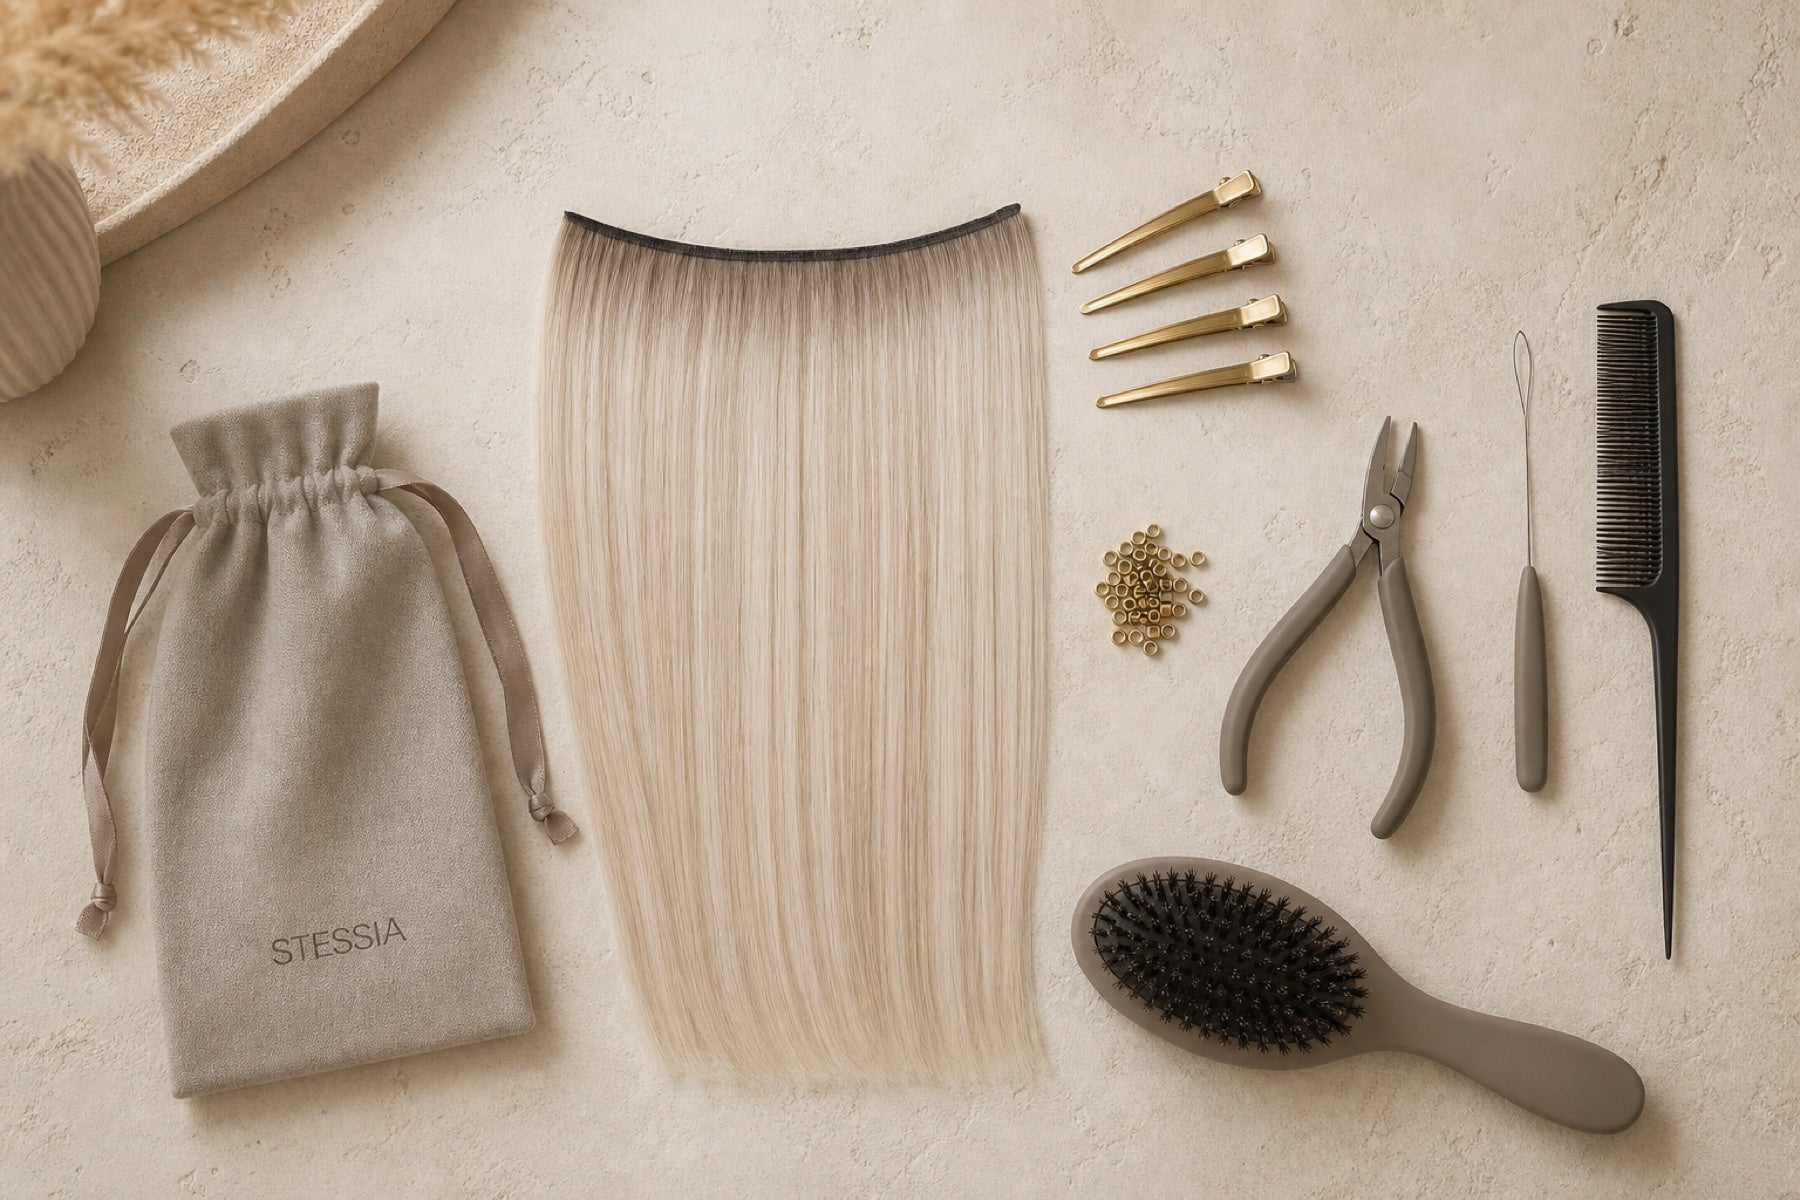
Everything within reach for a calm application.
You will need:
Stessia Butterfly Hole Weft · tail comb · sectioning clips · loop needle · color-matched microrings · microring pliers · extension brush.
Lay out all tools before you section the hair.
STEP BY STEP
How to apply your Stessia weft.
The number and position of the attachment points is individual. What matters is even distribution, a flat fit and pleasant comfort.
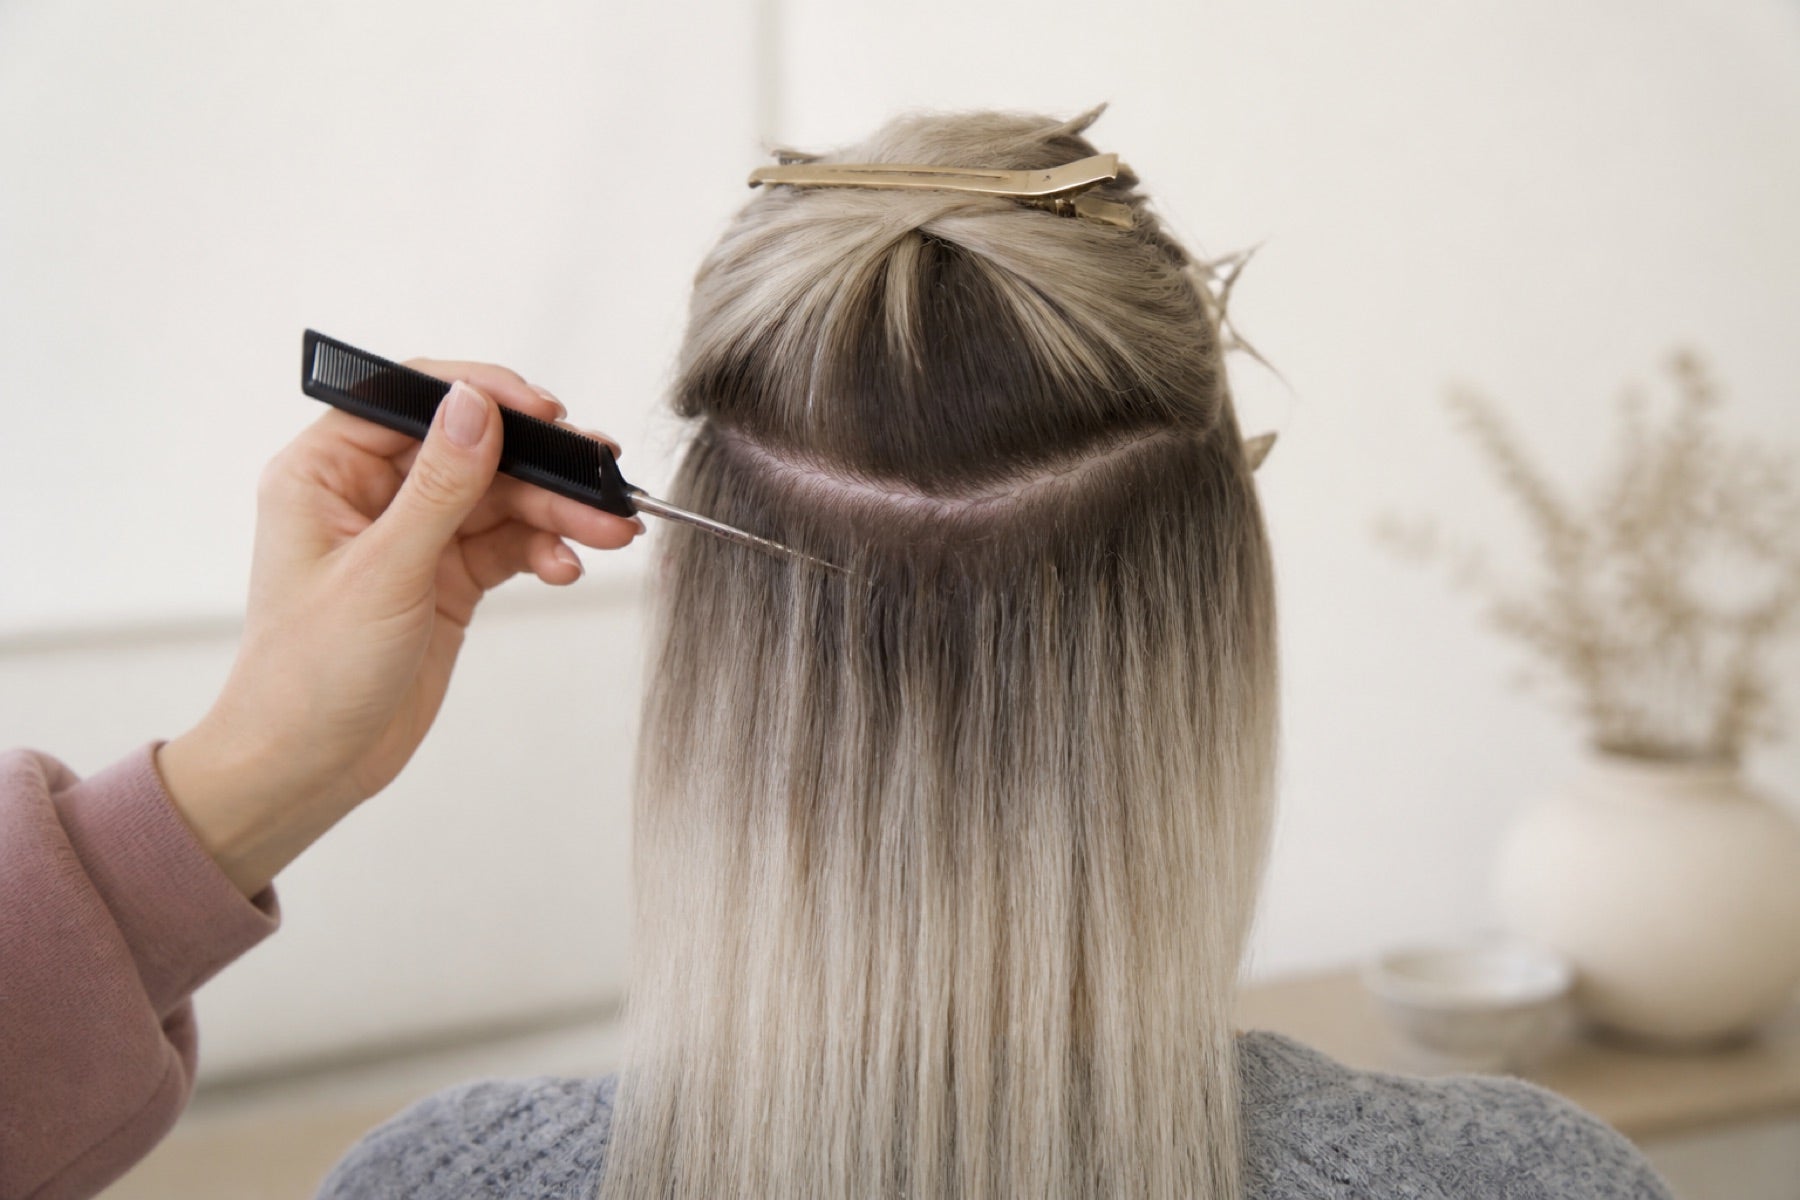
STEP 01
Create a clean section
At the back of the head, draw a gently curved section that follows the shape of the head. Pin the top hair up and keep the working line clean.
Keep in mind: Enough top hair must remain to cover the connection completely later on.
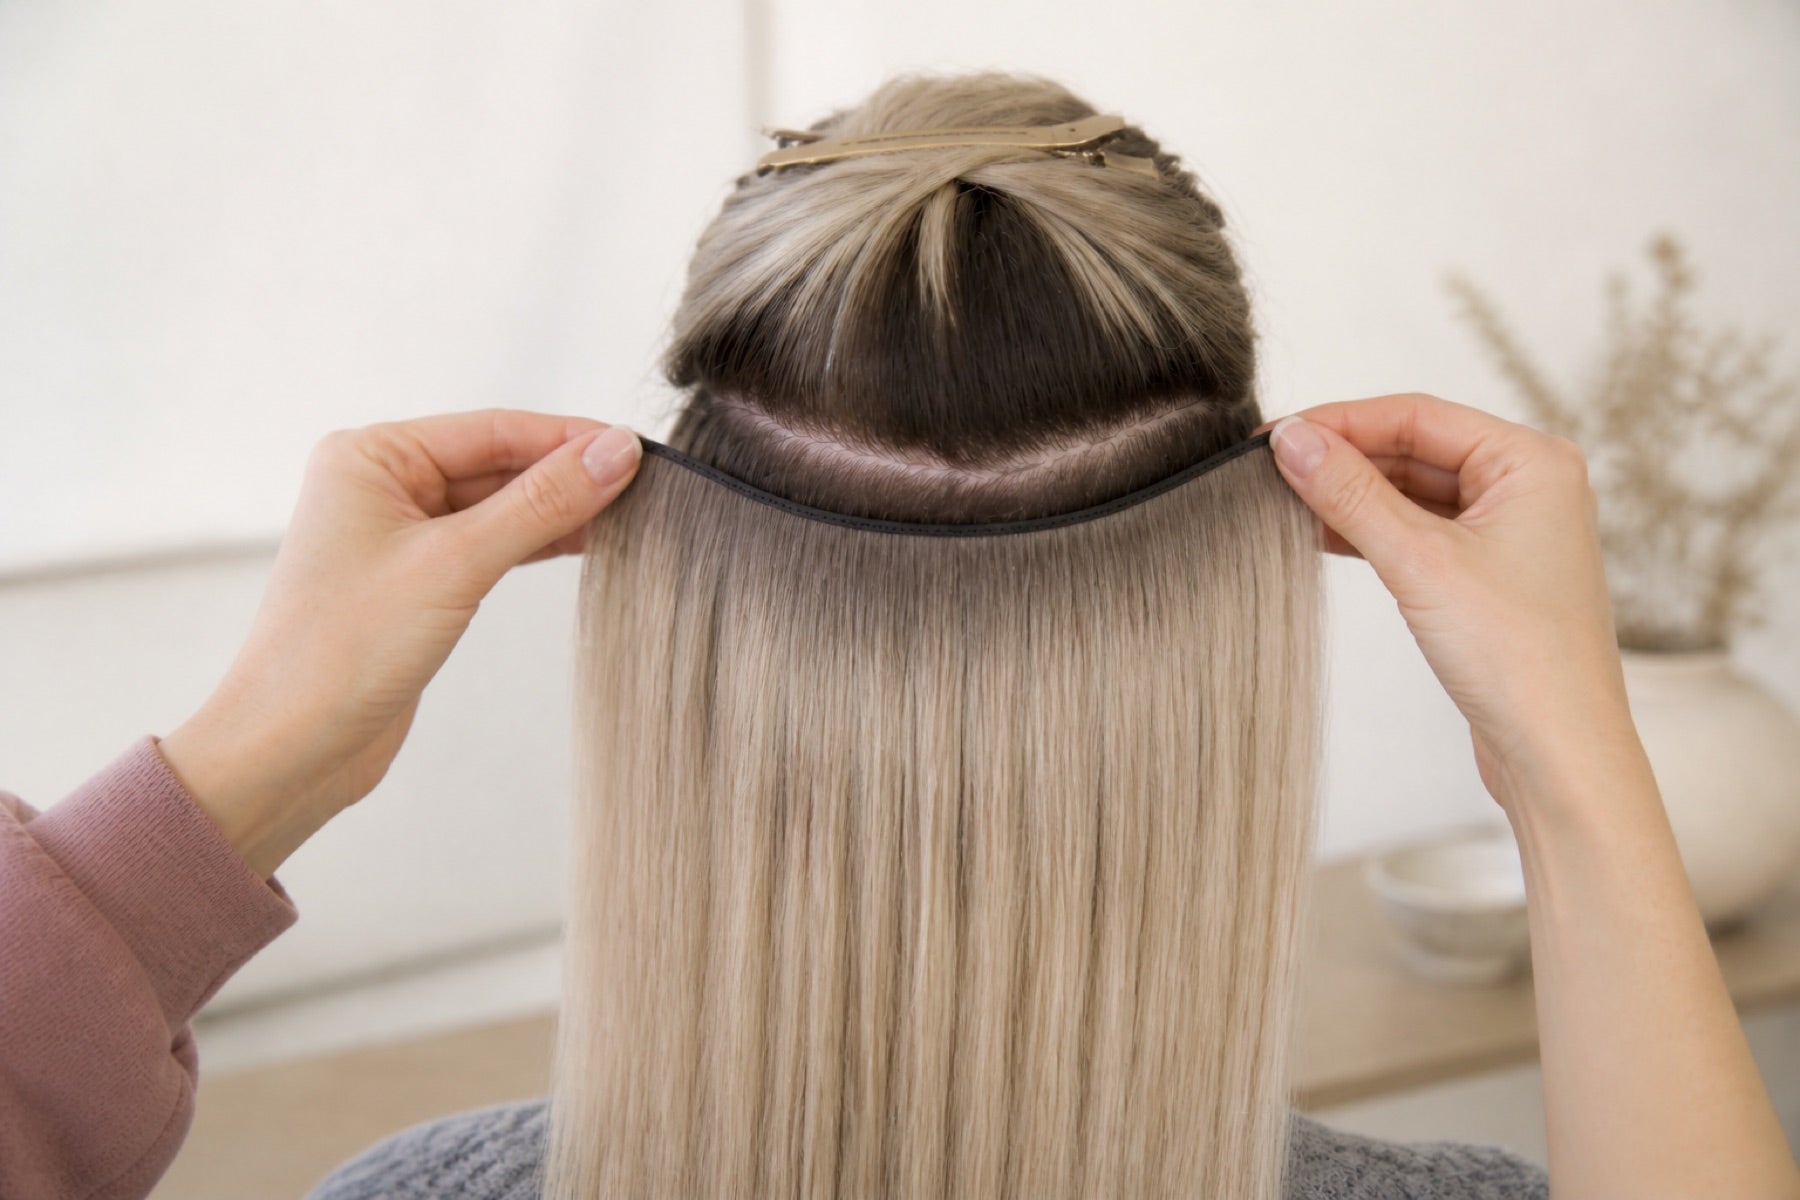
STEP 02
Adjust the weft to the head shape
Hold the weft along the section and check the width, curve and position. Leave about 0.5 cm of comfortable distance from the scalp.
Keep in mind: Do not pull it tight. The weft should follow the natural shape of the head.
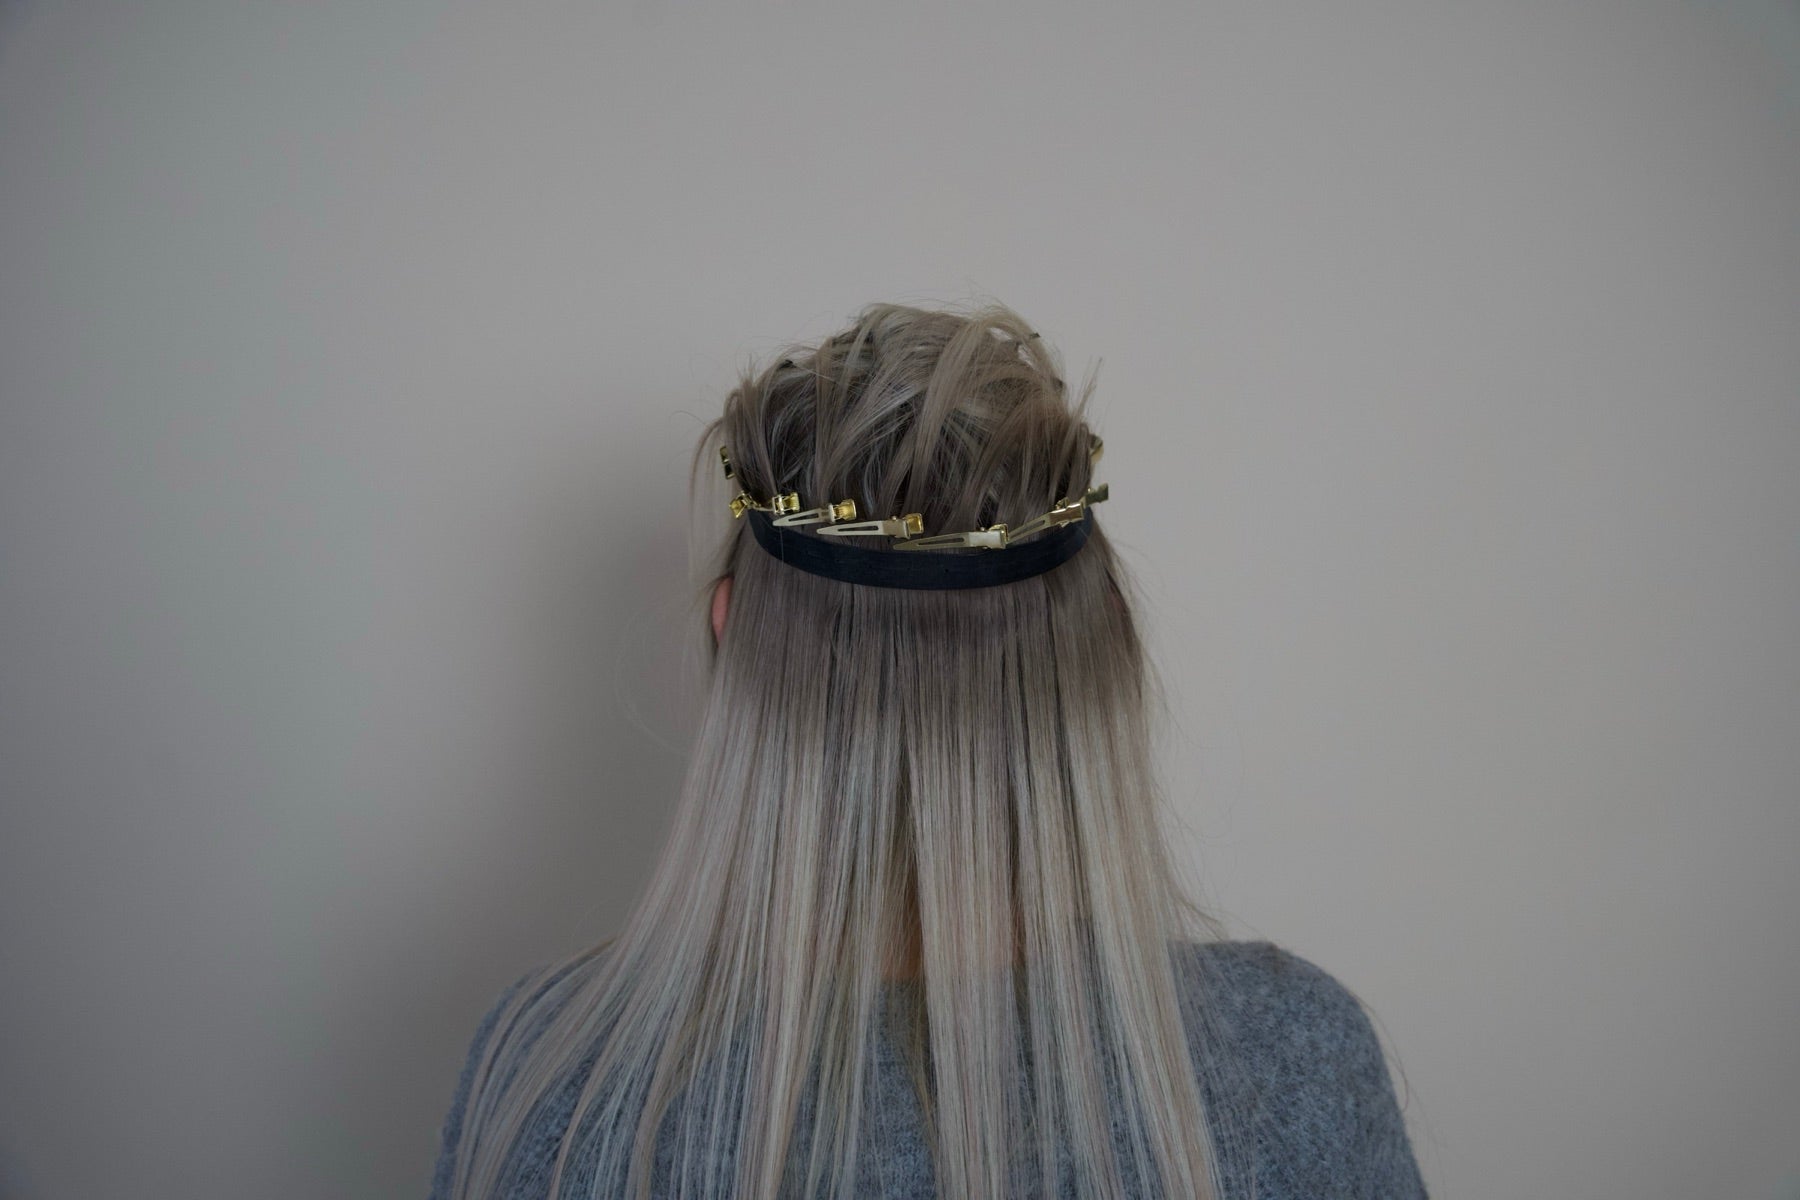
STEP 03
Open and secure the weft
Open the weft so that the attachment openings are accessible and secure it with clips along the prepared line.
Keep in mind: Check both ends so they do not become visible later.
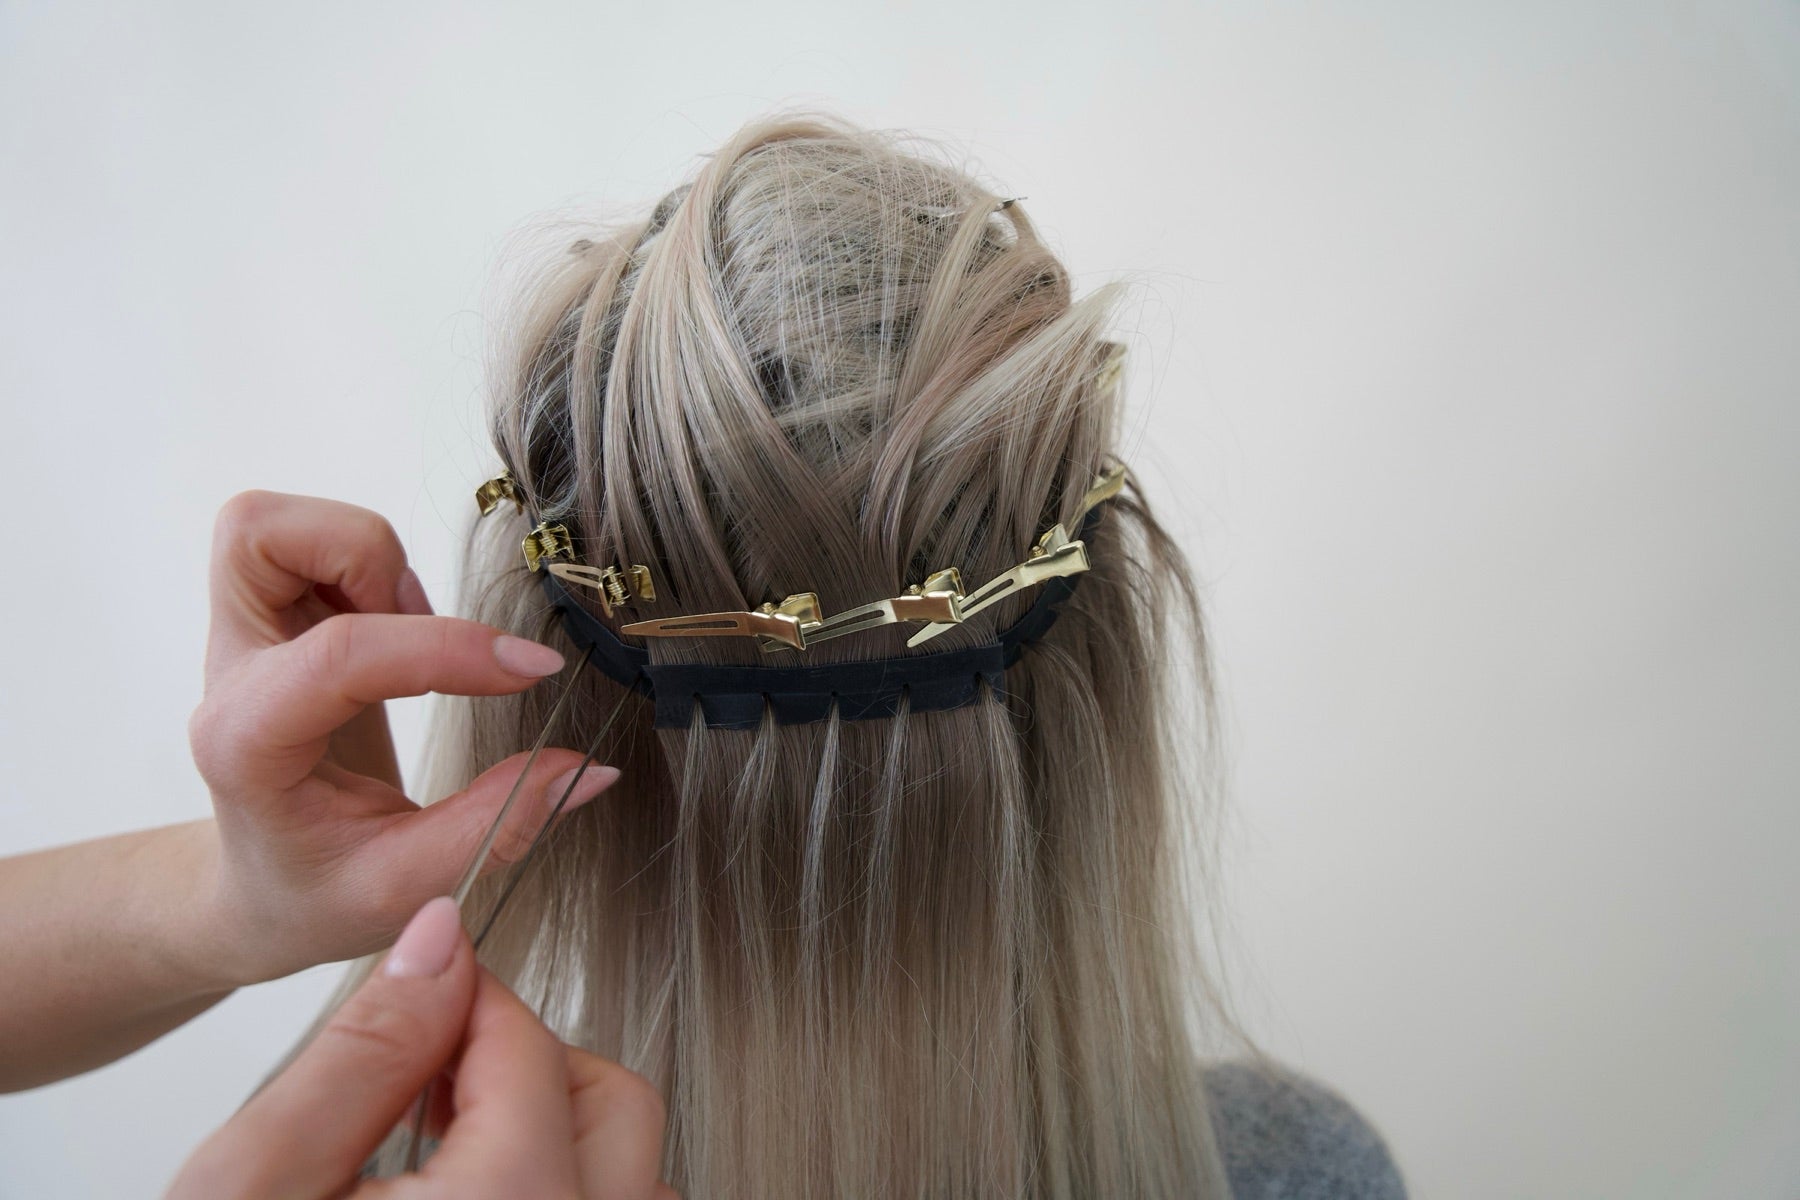
STEP 04
Pull your own hair through the openings
For each attachment point, take a small, even section of your own hair and pull it through the intended opening with the loop needle.
Keep in mind: Sections that are too large create pressure; sections that are too small may not offer enough hold.
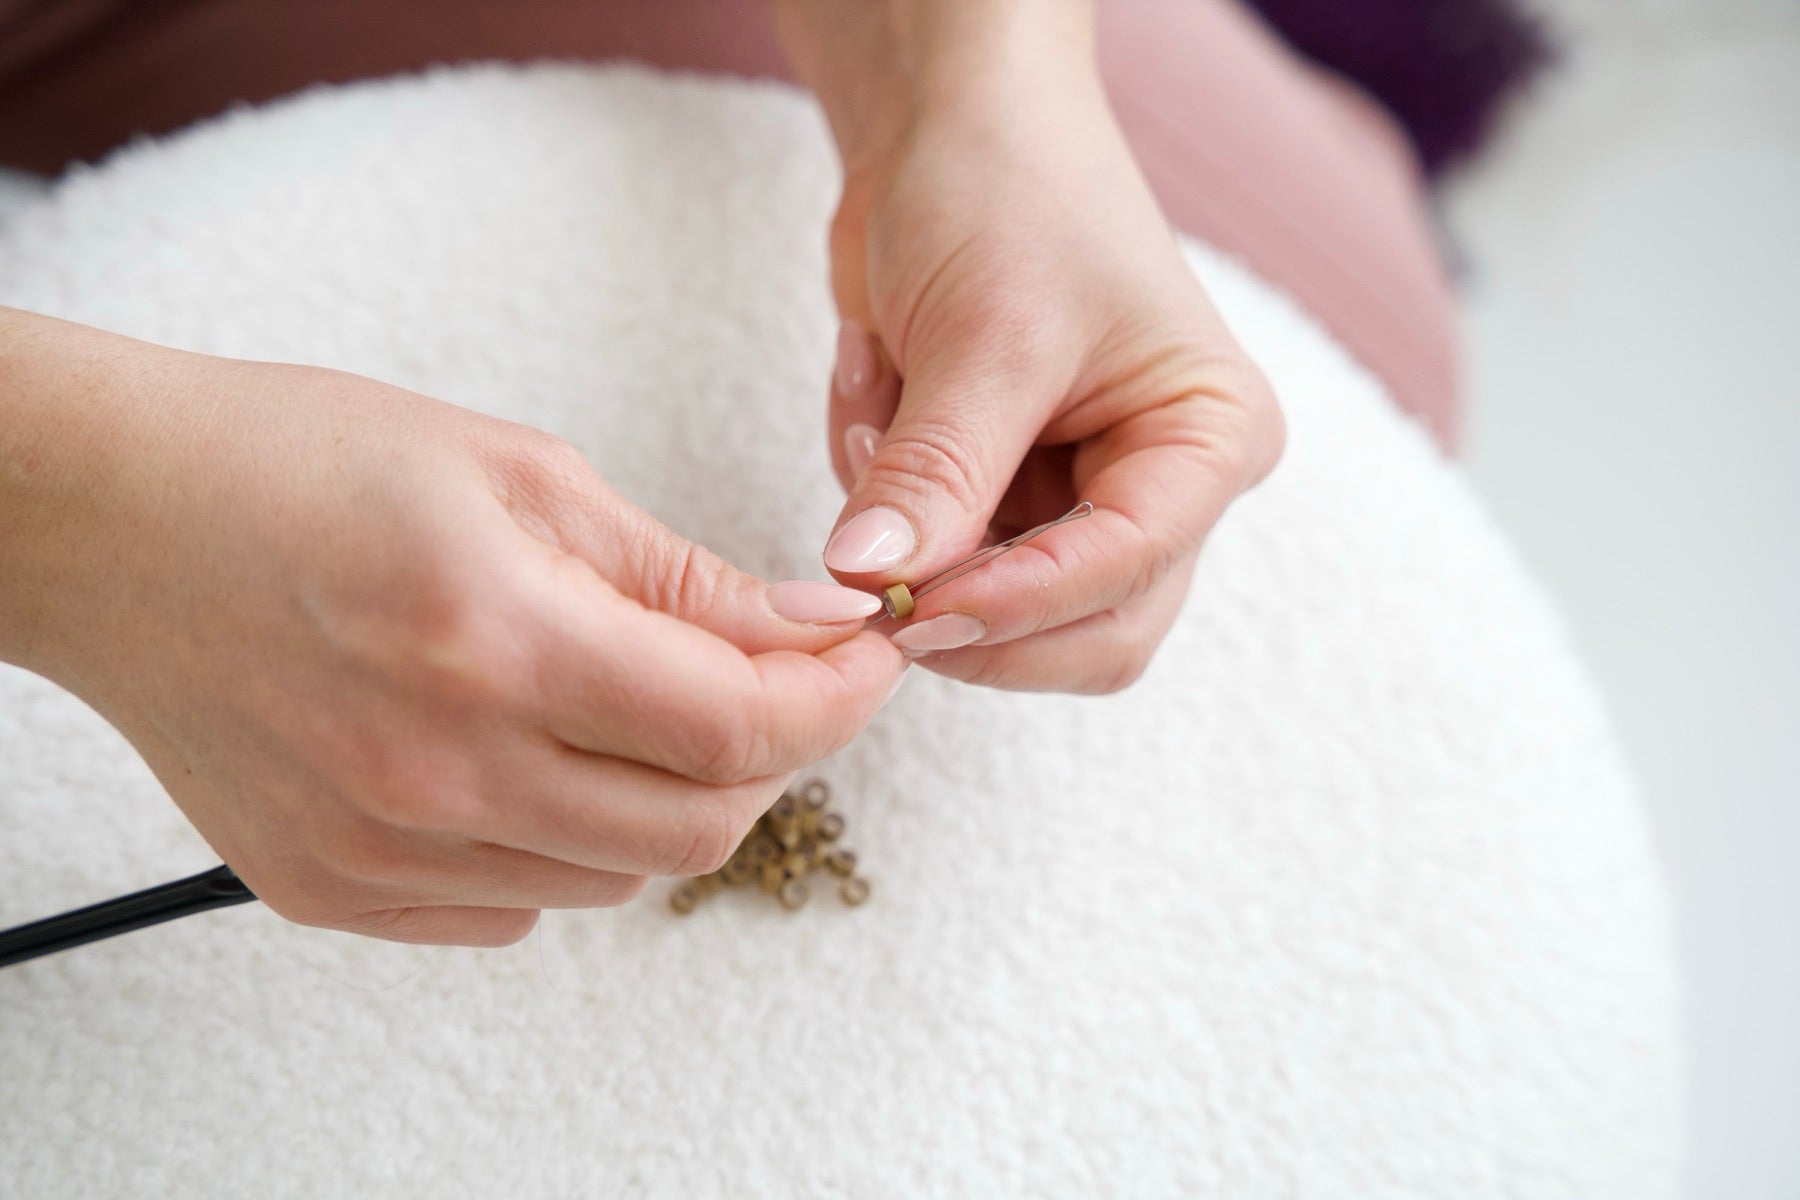
STEP 05
Connect the strands with a microring
Guide the strands that belong together through a color-matched microring with the loop and position it at the prepared point.
Keep in mind: Keep the hair smooth and avoid twisted or crossed strands.
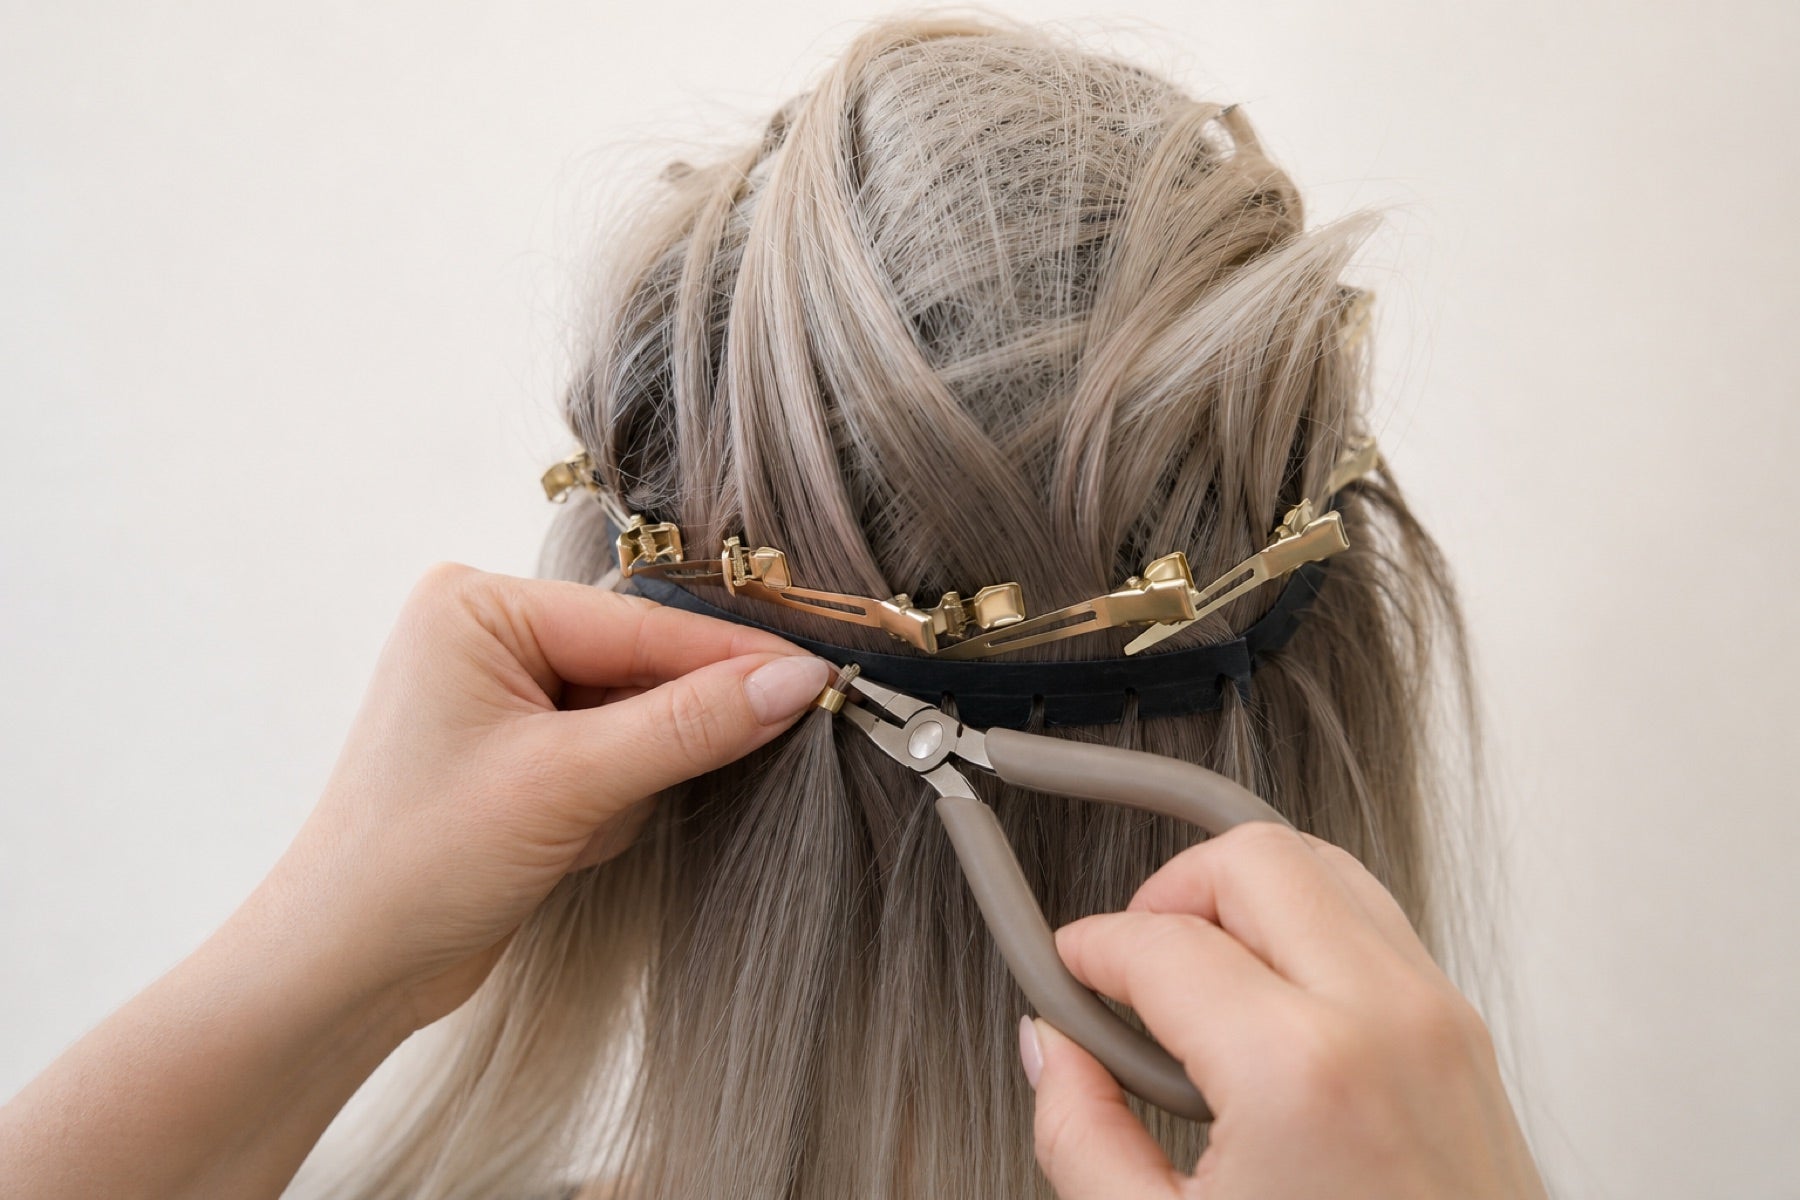
STEP 06
Flatten the microring
Stabilize the connection and close the microring evenly with the pliers. It should hold securely without sitting directly against the scalp.
Keep in mind: If it hurts or pulls strongly, open the ring and reposition it.
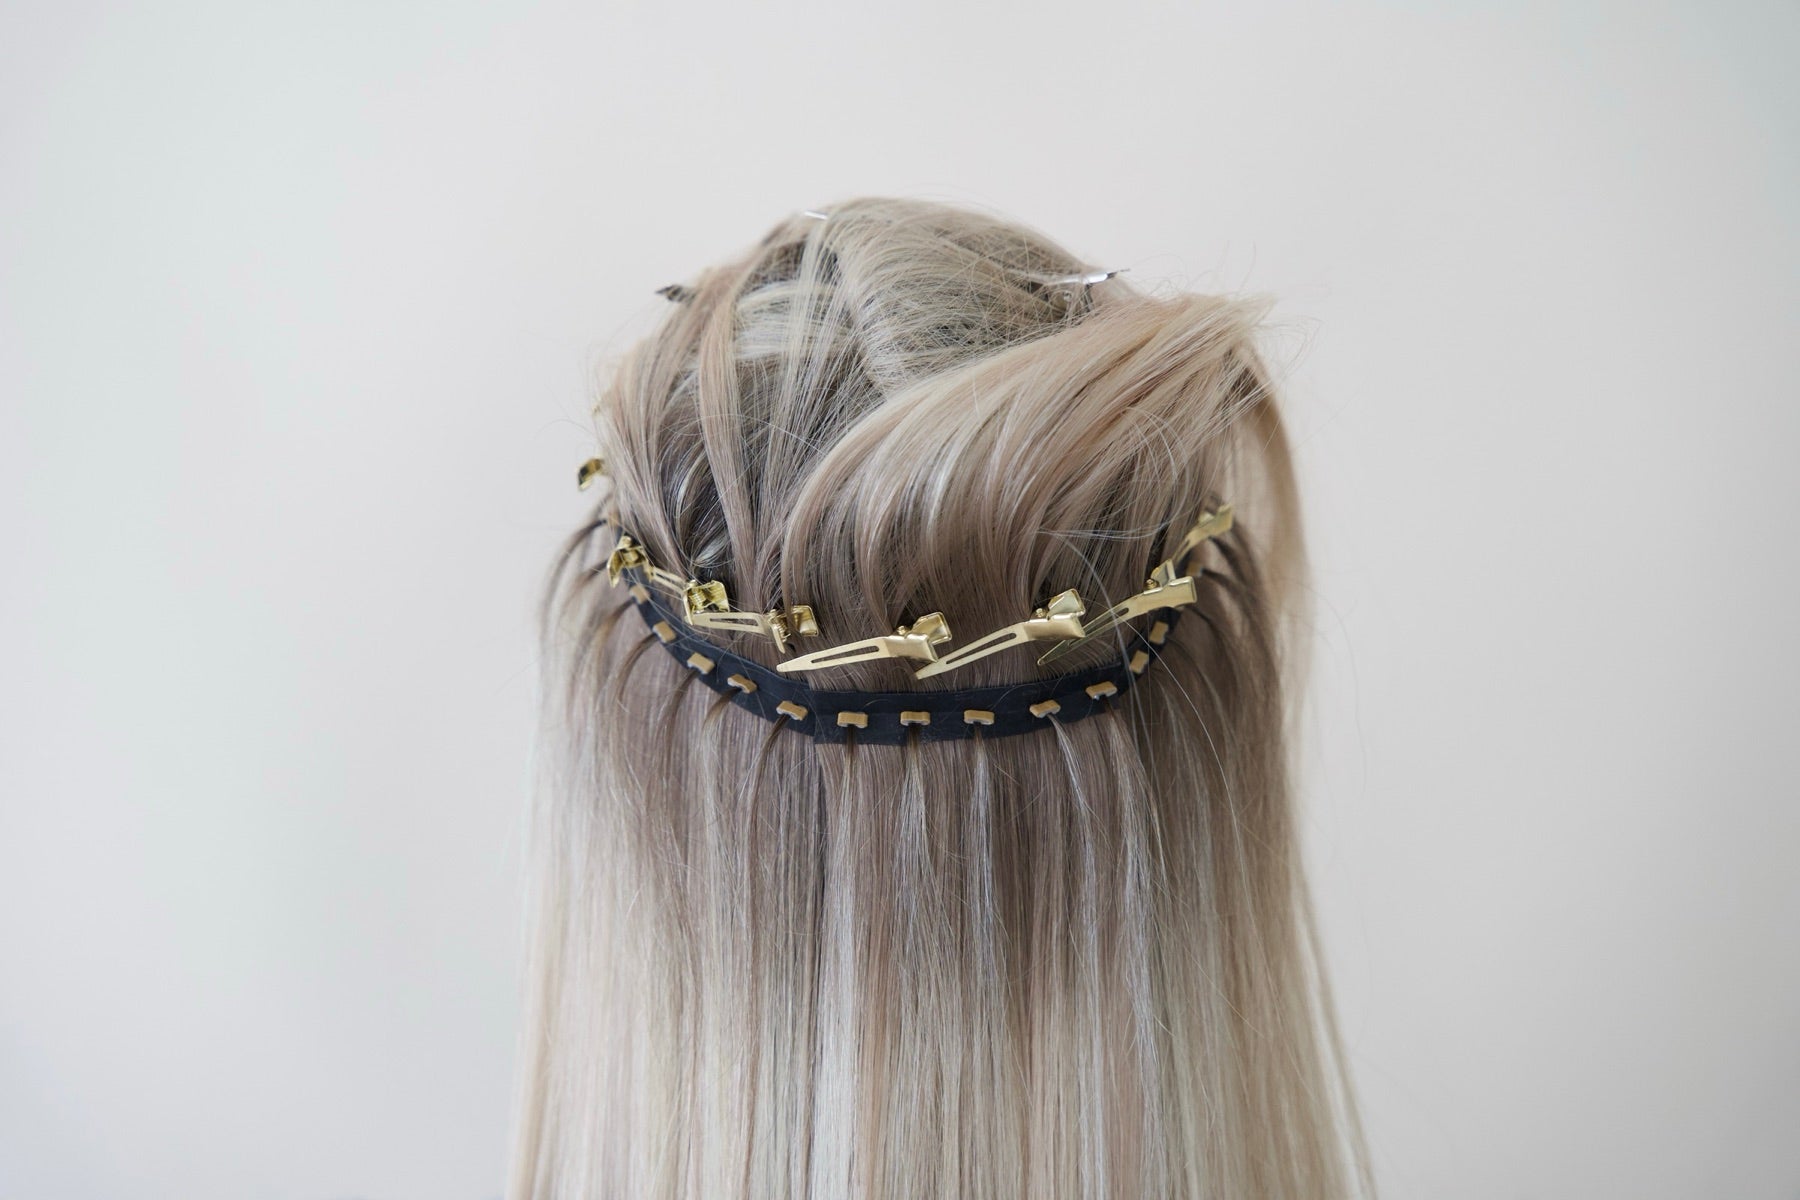
STEP 07
Finish the row evenly
Repeat the attachment across the width you need. Head shape, hair density and the individually adjusted weft determine the number and spacing of the points.
Keep in mind: Check regularly that the row stays flat, even and free of tension.
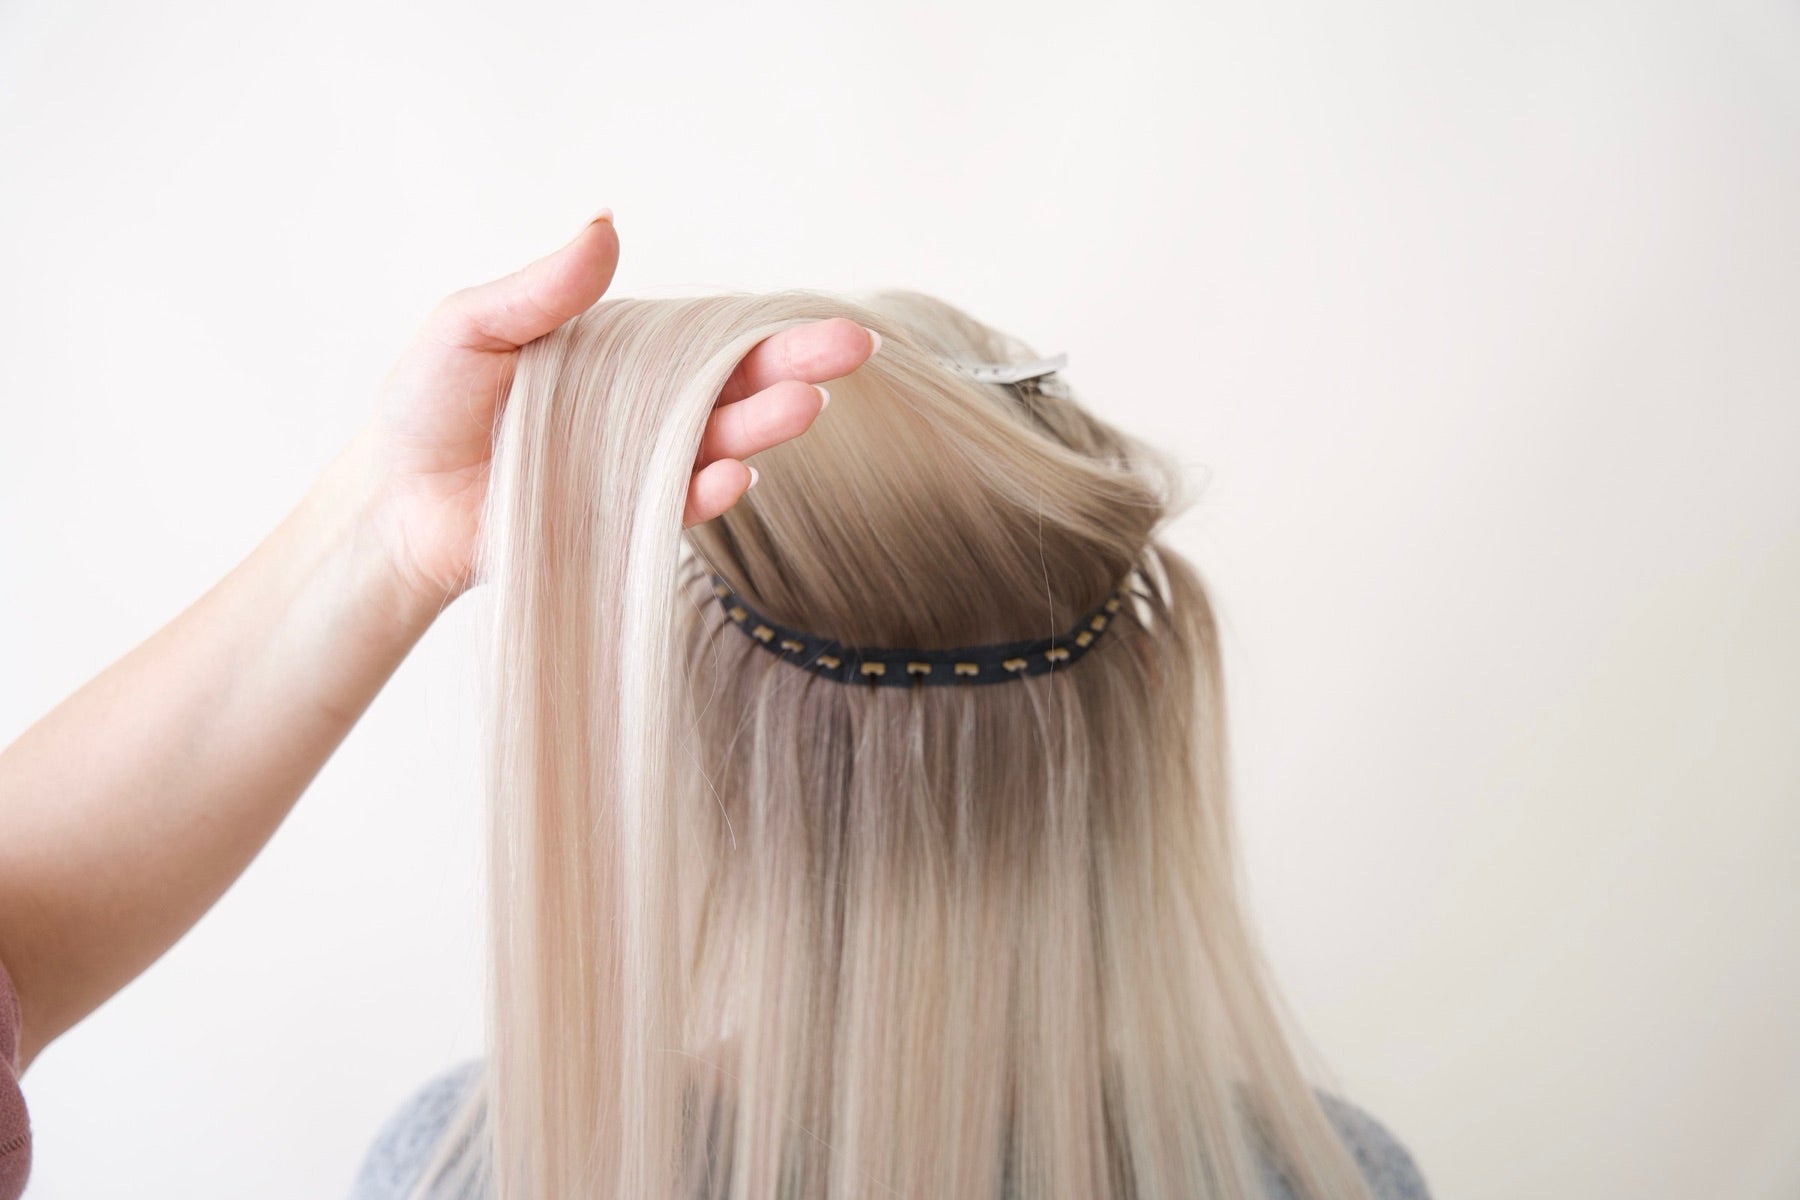
STEP 08
Close the sandwich
Once all points are attached, fold the upper part of the weft down. The microrings now sit hidden between the two sides of the weft.
Keep in mind: Before you let the top hair down, check that no bead and no end is visible.
0.5 cm as a guide for more comfort.
About 0.5 cm of distance from the scalp helps to reduce pressure and tension. The connection should not hurt, pull or press directly against the scalp.
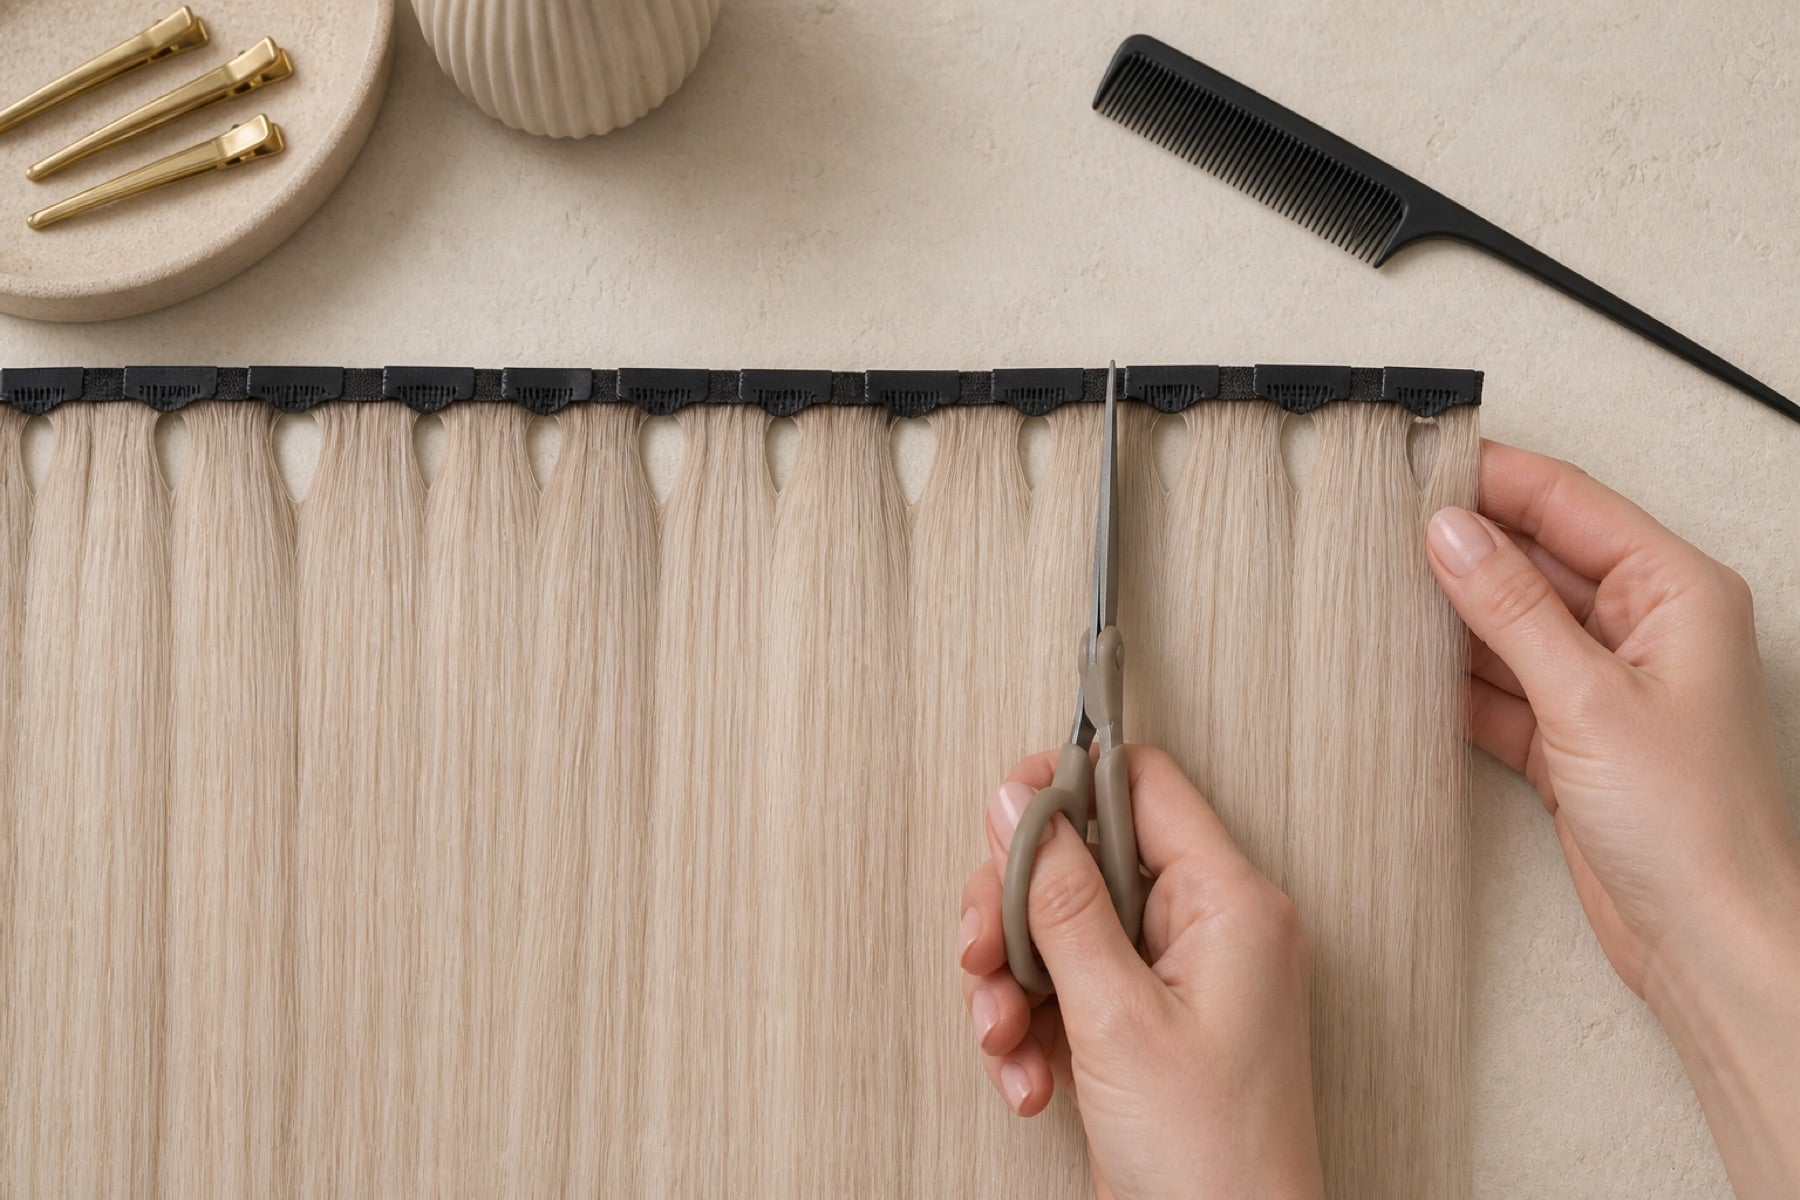
One weft - matched to your head.
The Stessia weft is delivered in one piece and can be divided wherever different widths or positions are needed.
First measure the width you need on the head. Only divide between suitable attachment segments and check the cut edge and the hold before application.
CHECK DIRECTLY
Four signs of a good fit.
Check these points before you complete the application.
Pain-free fit
The connection sits comfortably and without pressure on the scalp.
Tension-free hold
The weft follows the shape of the head without pulling on your own hair.
Flat connection
Every ring is securely closed and the weft lies evenly.
Completely hidden
Band, microrings and ends stay invisible under the top hair.
FASTER RE-FITTING
Open, re-fit and close again.
As your own hair grows, the weft can be moved back closer to the scalp using the existing attachment points. Intact microrings can be reused depending on their condition.
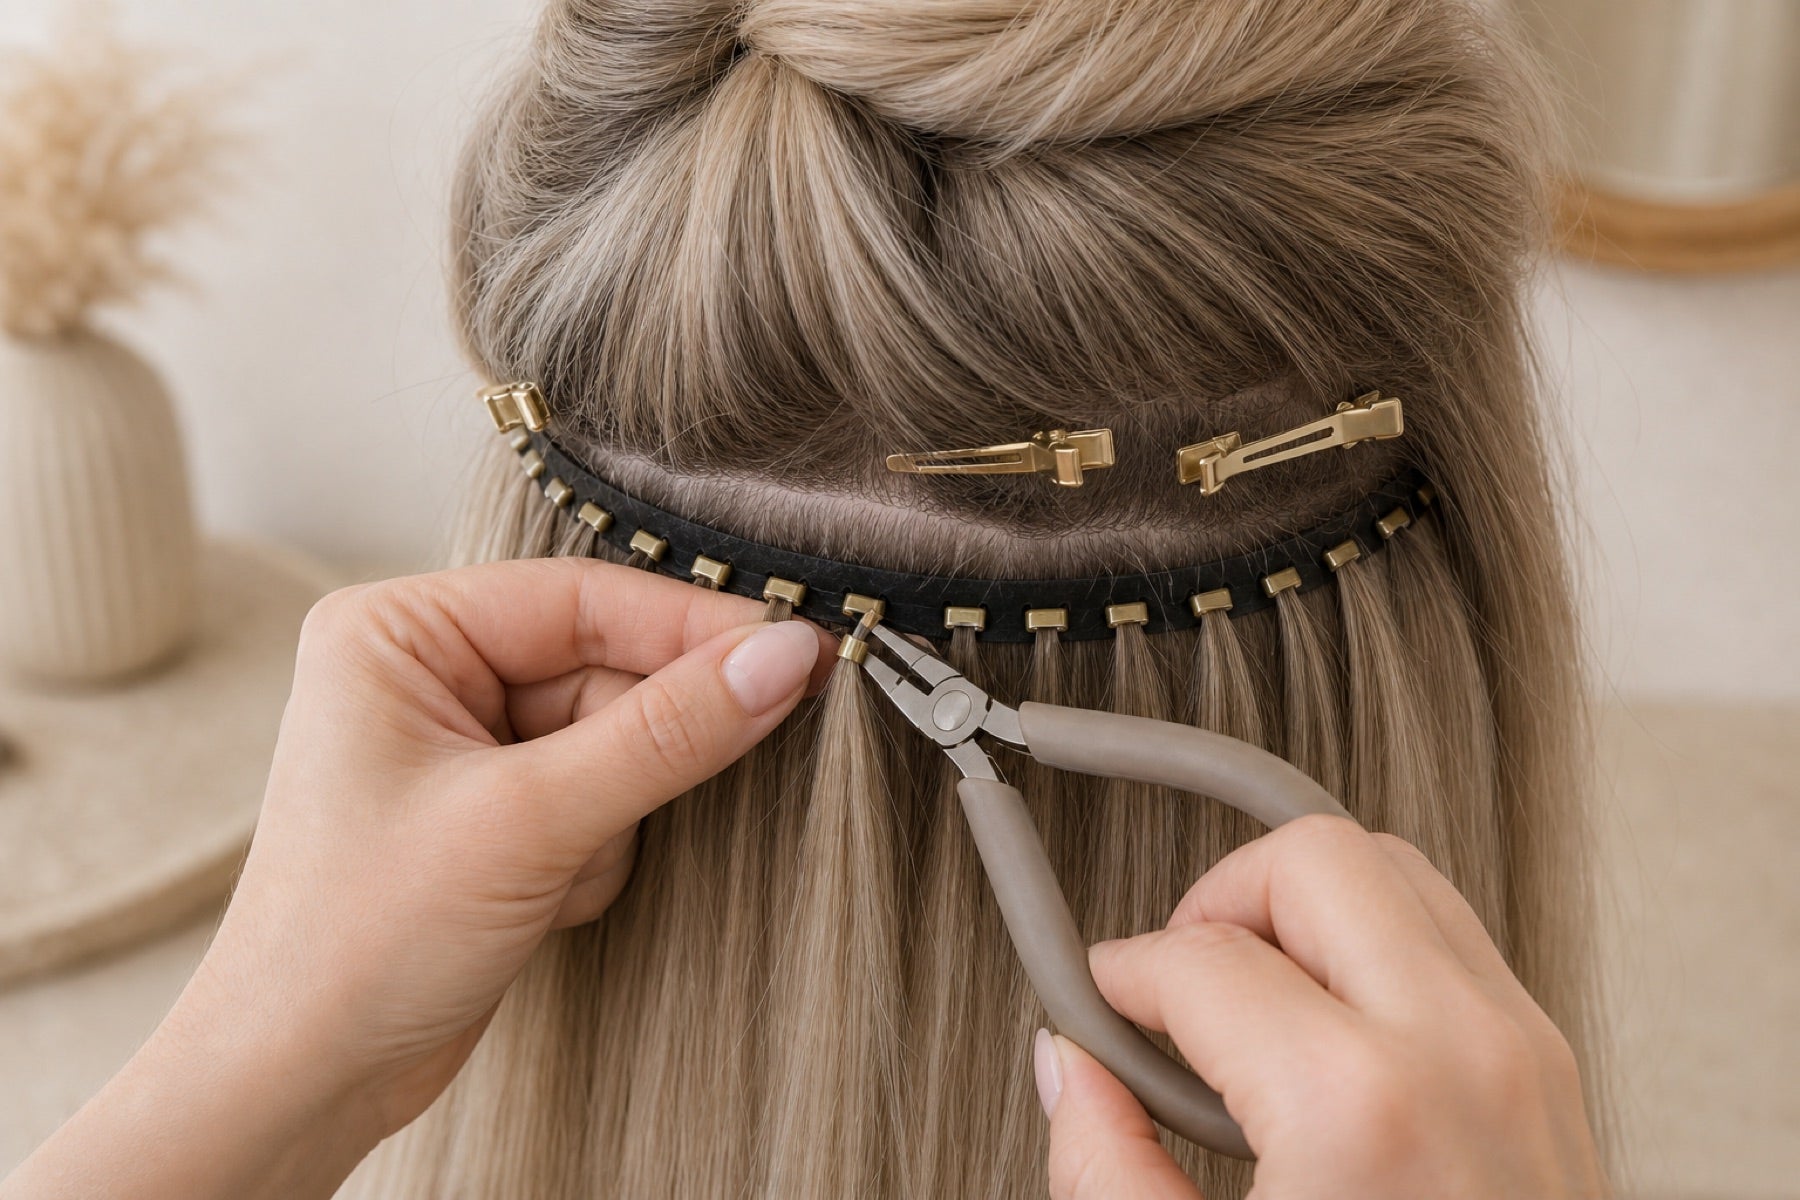
01 · Open the microrings carefully
Place the pliers on the narrow sides of the flattened ring and open it without pulling on your own hair.
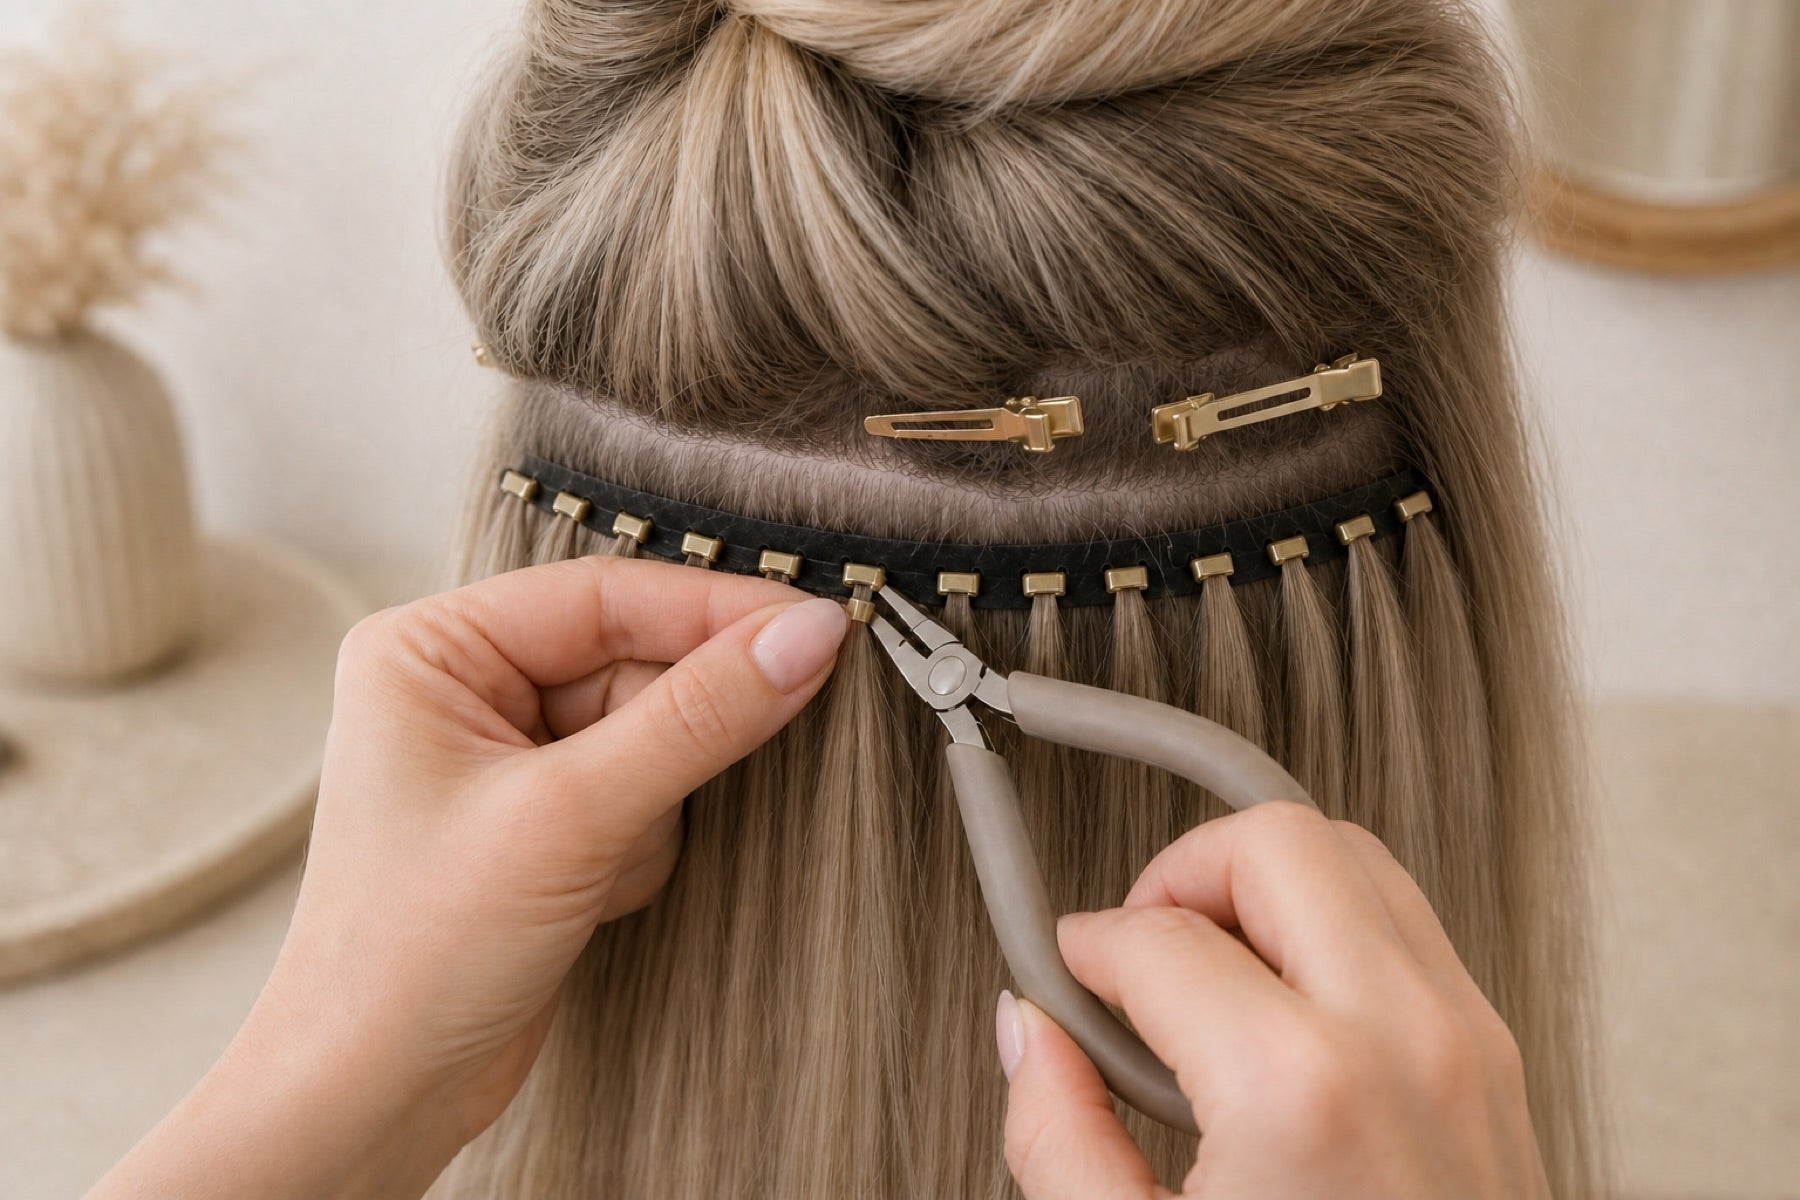
02 · Re-fitting and closing again
Slide the weft and rings up evenly to a comfortable distance and flatten the rings again.
Frequently asked questions.
The key answers on application and re-fitting.
Can I apply the extensions on my own?
In principle, yes. For the back of the head we do recommend a second person, because sectioning, spacing and tension can be controlled far better that way.
How close to the scalp can the weft sit?
About 0.5 cm of distance is a good guide. What matters is that the connection does not hurt, press or pull on your own hair.
How many attachment points do I need?
This is individual and depends on head shape, hair density, and the width and placement of the weft. The points should be evenly distributed and hold the weft flat.
What do I do if it pulls or hurts?
Open the affected microring and reposition the connection with less tension and a comfortable distance.
Can I use the same microrings when re-fitting?
Depending on their condition, yes. Before closing them again, check that the ring and the silicone lining are undamaged and hold reliably.
You decide how you get to your result.
Learn the application step by step, or find a Stessia partner who takes care of color, placement and attachment professionally for you.